K&K Networks remote support with Quick Connect
Step-by-step instructions for Windows, macOS, Linux, iOS, and Android to safely start K&K Networks remote support with Quick Connect.
Enter or copy this code without spaces.
Direct support
Fastest way to contact our support team:
Windows · macOS · Linux · iOS · Android · Troubleshooting
Windows
TLDR
After opening support.kuk-networks.de, you are automatically redirected to the Quick Connect page. If this does not happen, click Open remote support. On the Quick Connect page, click Connect. The remote-support program will then be downloaded. Open your browser’s download list and run the downloaded file. Alternatively, you can open the file from the folder where it was saved using Windows File Explorer.
-
Open remote support
Open Windows remote support and click Open remote support. The Quick Connect tool will download. If this does not work, please use the fallback link available via the Alternatively, open the Quick Connect page button.
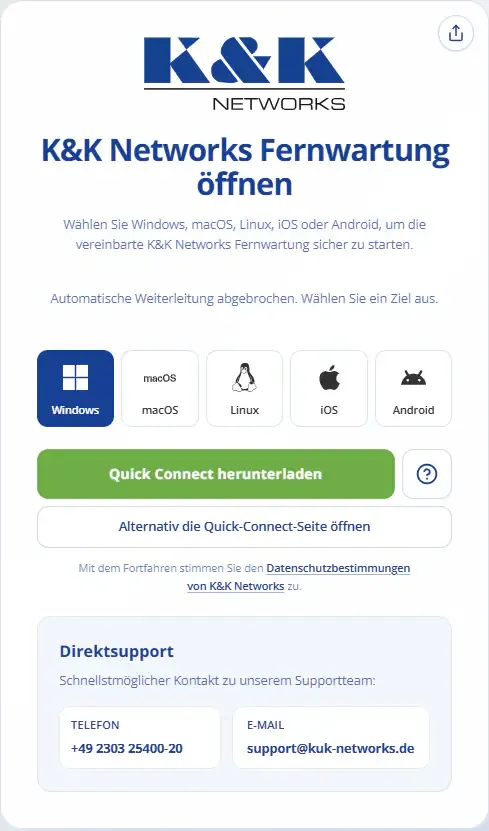
The Quick Connect page opens with the matching invitation code. -
Fallback: Download Quick Connect
Confirm the connection by clicking Connect on the Quick Connect page. The remote-support program will then be downloaded.
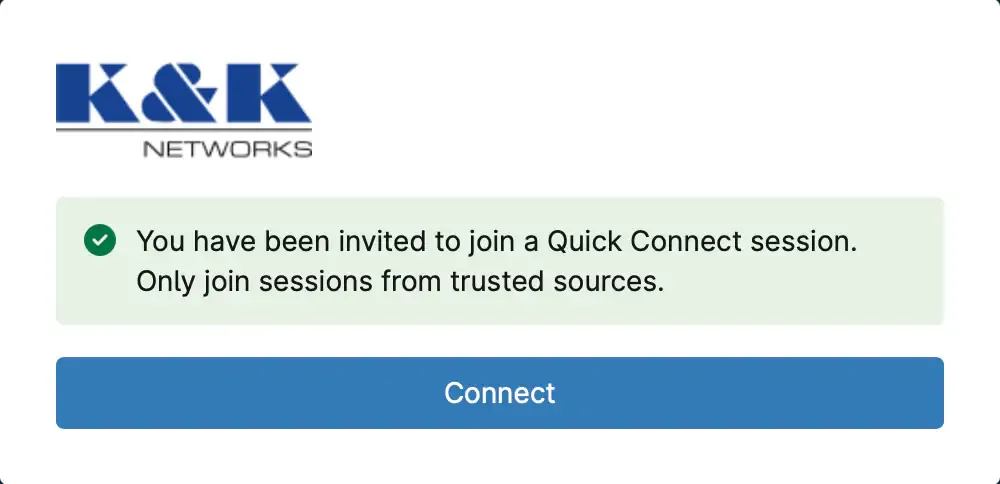
Start the download by selecting “Connect”. -
Run the downloaded file
Open only the file you just downloaded through the K&K Networks support site. Windows or your browser may display a security prompt.
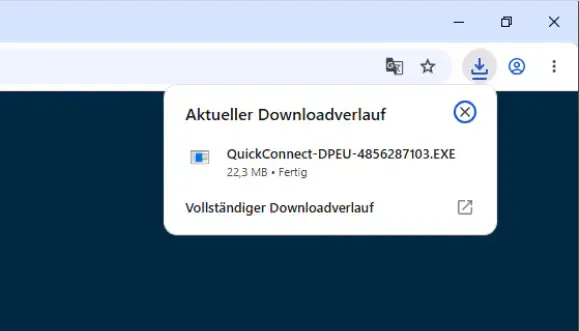
Run the downloaded remote-support program. The remote-support program will then start. The Quick Connect icon in the taskbar notification area indicates that it started successfully. Depending on your Windows version and taskbar settings, the icon may be hidden. In that case, expand the notification area to see it.
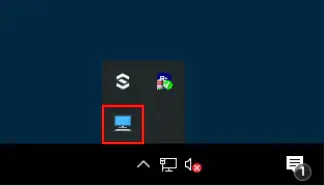
The Quick Connect icon in the taskbar indicates that remote support is active. -
Approve access
Keep Quick Connect open. When our support technician starts the session, approve the connection request on your device if prompted.
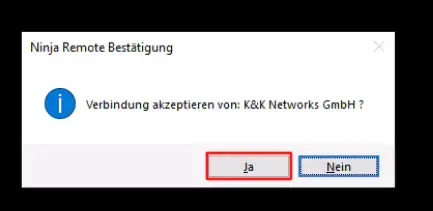
Approve the connection request only for the remote-support session you arranged. The desktop background will then be hidden and your screen will be shared with our support team. The Quick Connect indicator on the right side of the screen shows that our support team can see your screen.
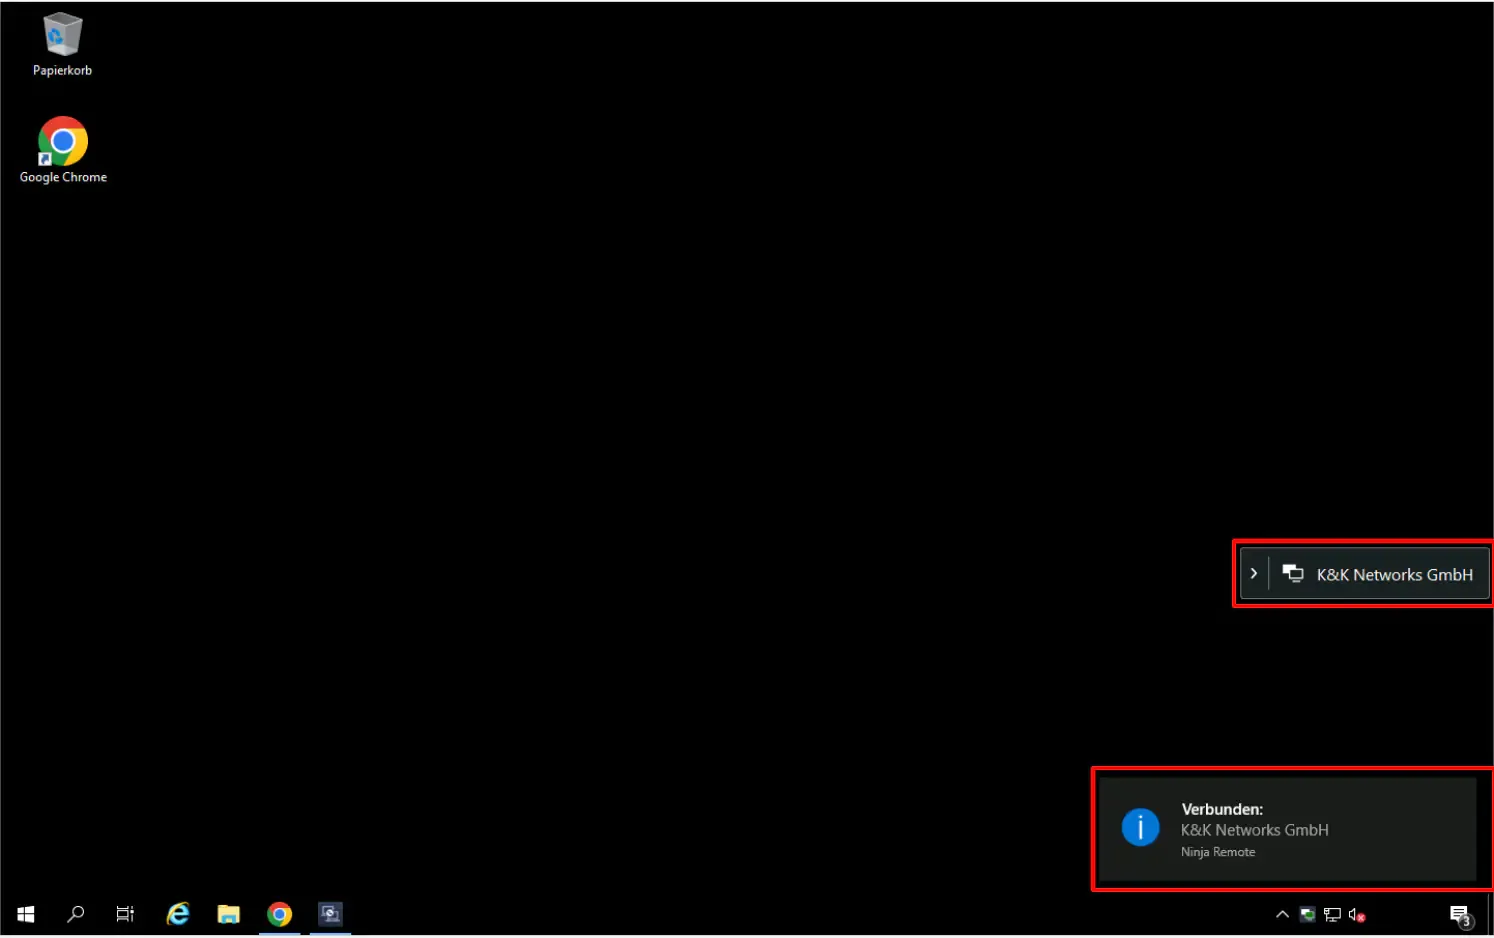
The Quick Connect indicator on the right side of the screen shows that remote support is active.
macOS
On macOS, Quick Connect downloads a small temporary remote-support program. According to NinjaOne, administrator rights are generally not required for a normal Quick Connect installation.
-
Open remote support
Open macOS remote support and click Open remote support. The Quick Connect tool will download. If this does not work, please use the fallback link available via the Alternatively, open the Quick Connect page button.
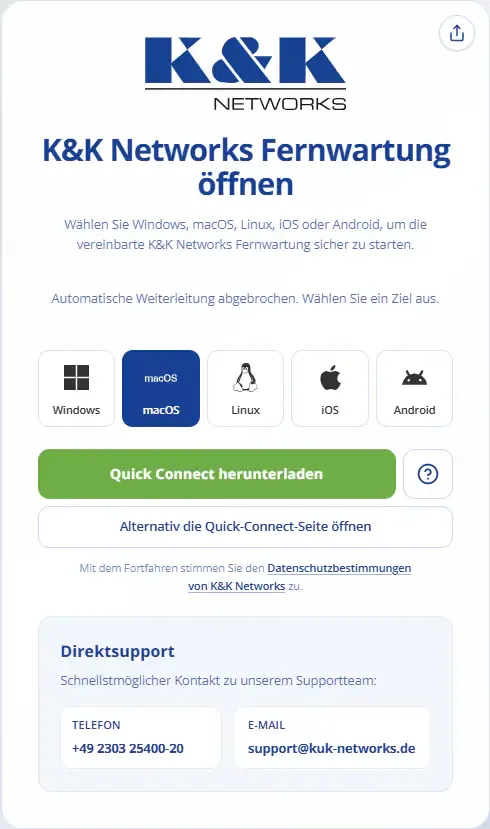
The Quick Connect page opens with the matching invitation code. -
Fallback: Download Quick Connect
Confirm the connection by clicking Connect on the Quick Connect page. The remote-support program will then be downloaded.
Start the download by selecting “Connect”. -
Run the downloaded file
Open only the file you just downloaded through the K&K Networks support site.
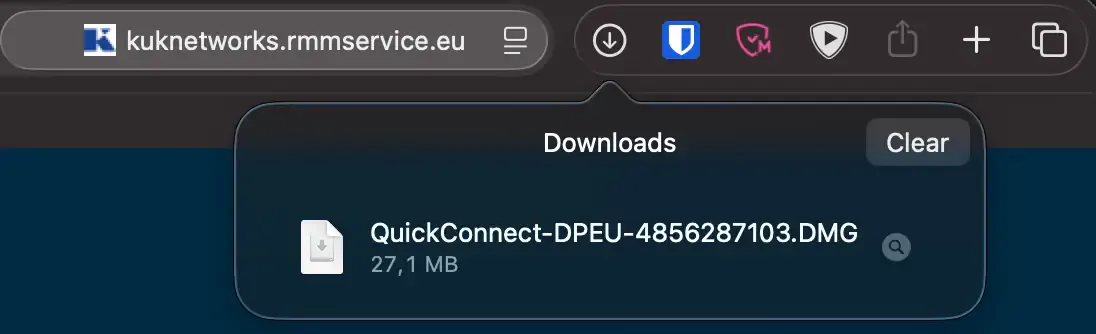
Run the downloaded remote-support program. The remote-support program will then be started by the downloader.
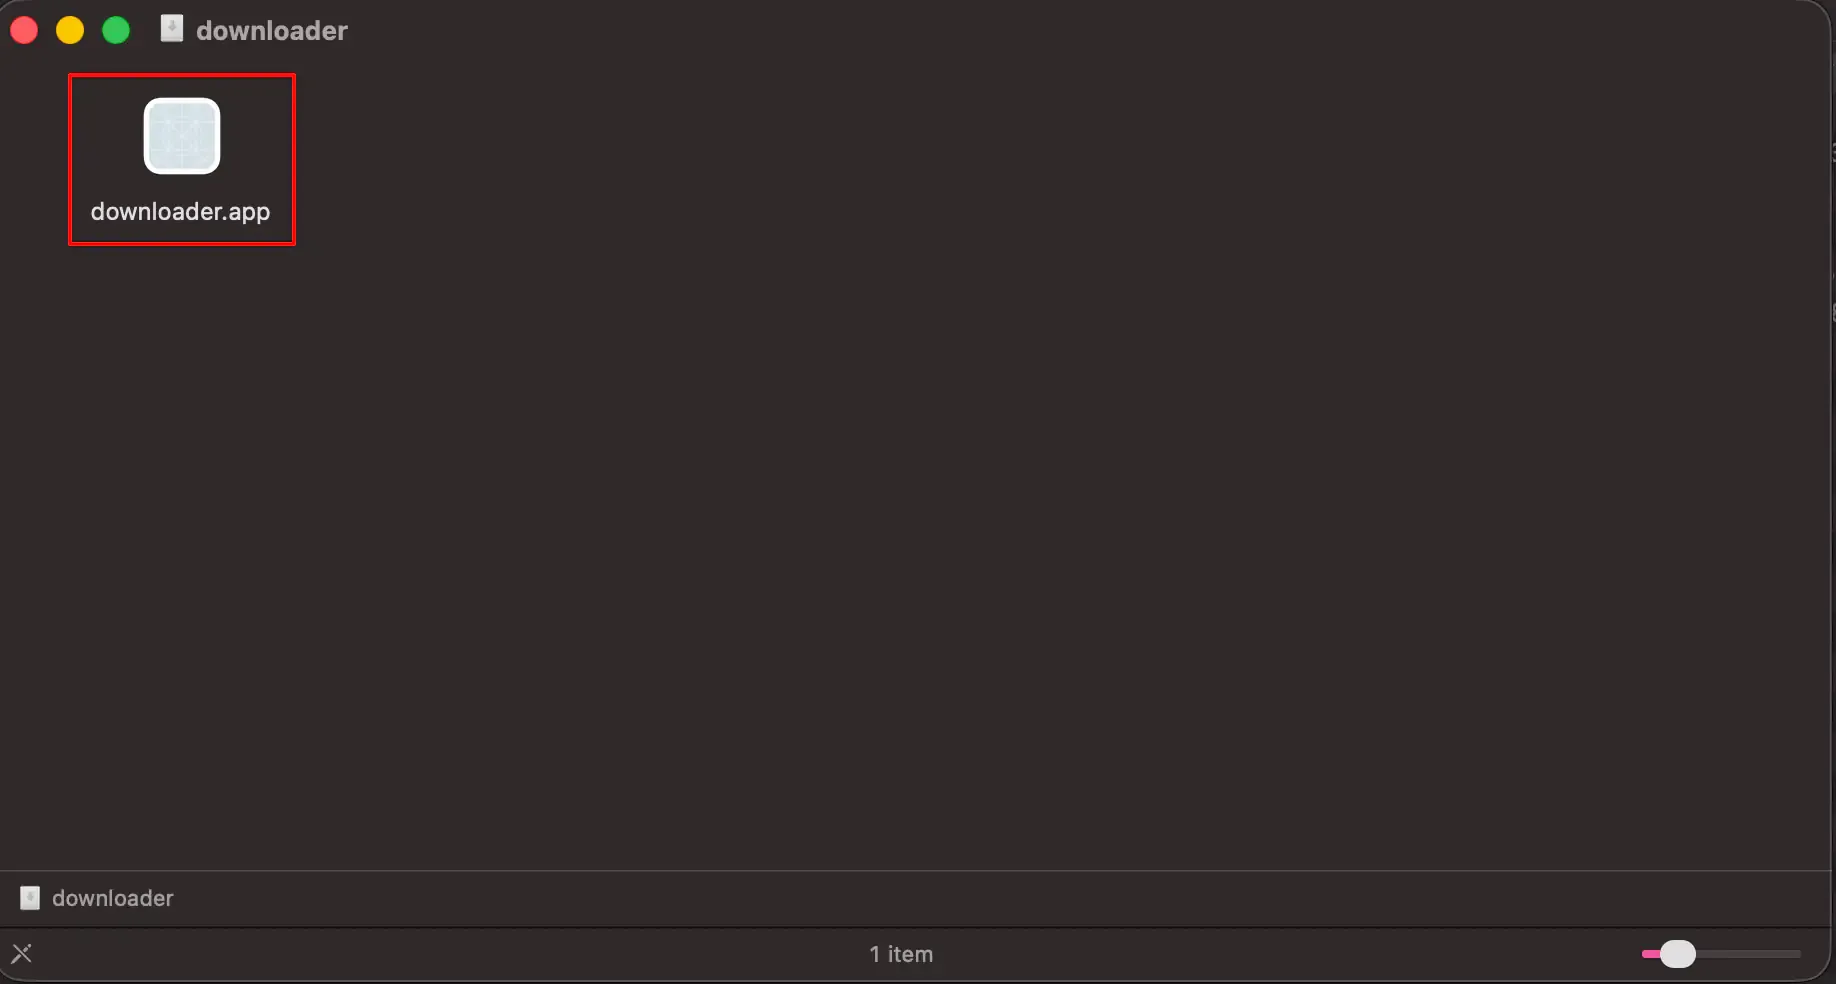
Start the downloader. You must also confirm this action because macOS blocks programs downloaded from the internet. Confirm the security prompt to open the downloaded file.
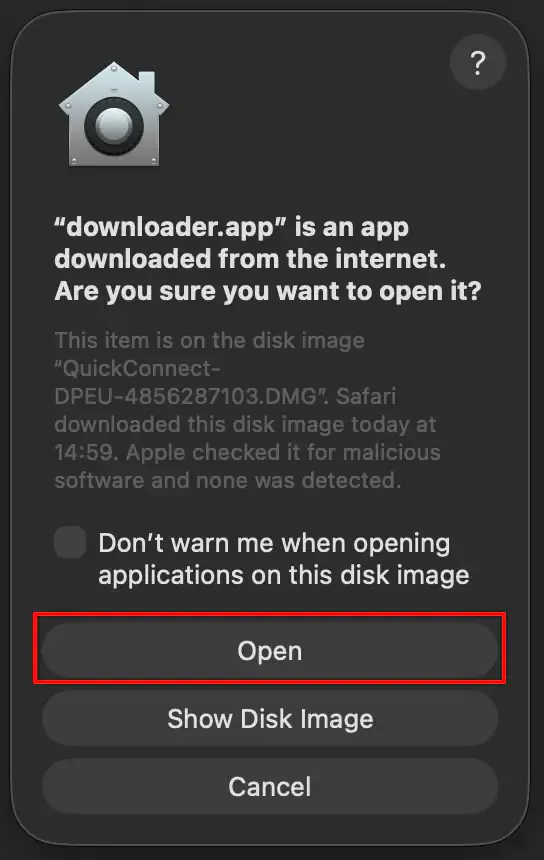
Confirm the security warning. The Quick Connect icon in the menu bar indicates that the program started successfully.
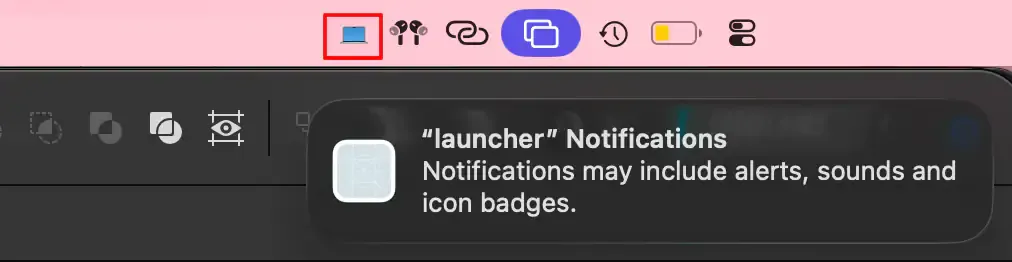
The Quick Connect icon in the menu bar indicates that remote support is active. -
Grant macOS permissions
macOS will request Screen Recording, Accessibility, and Full Disk Access permissions. A window will open where you can grant these permissions. The following example shows only Full Disk Access.
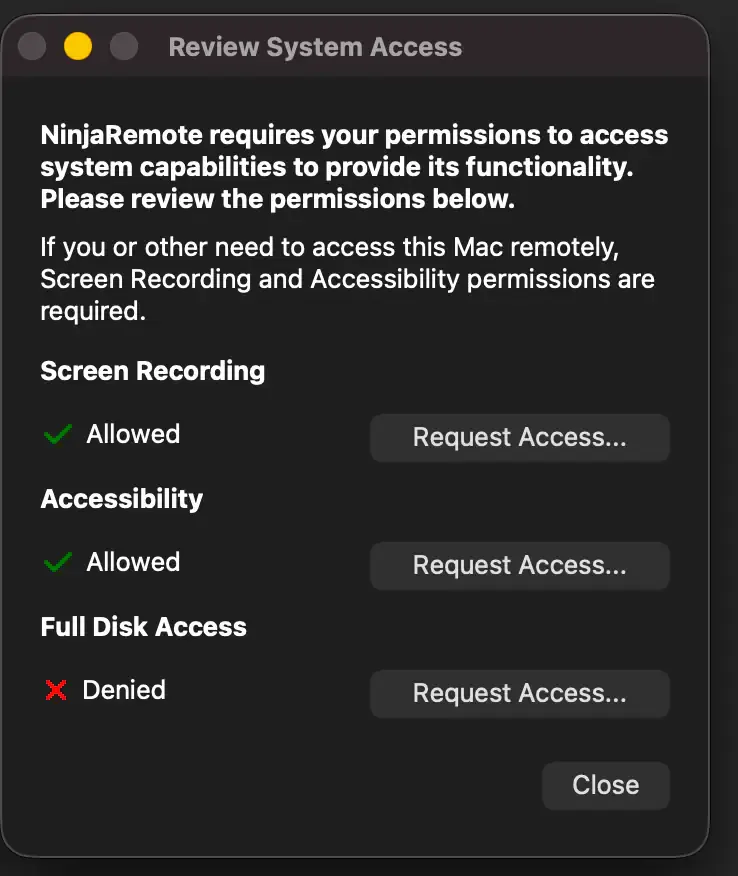
Window for granting permissions in macOS. Grant the permissions by selecting the corresponding checkboxes. You may need to enter your password to confirm the changes.
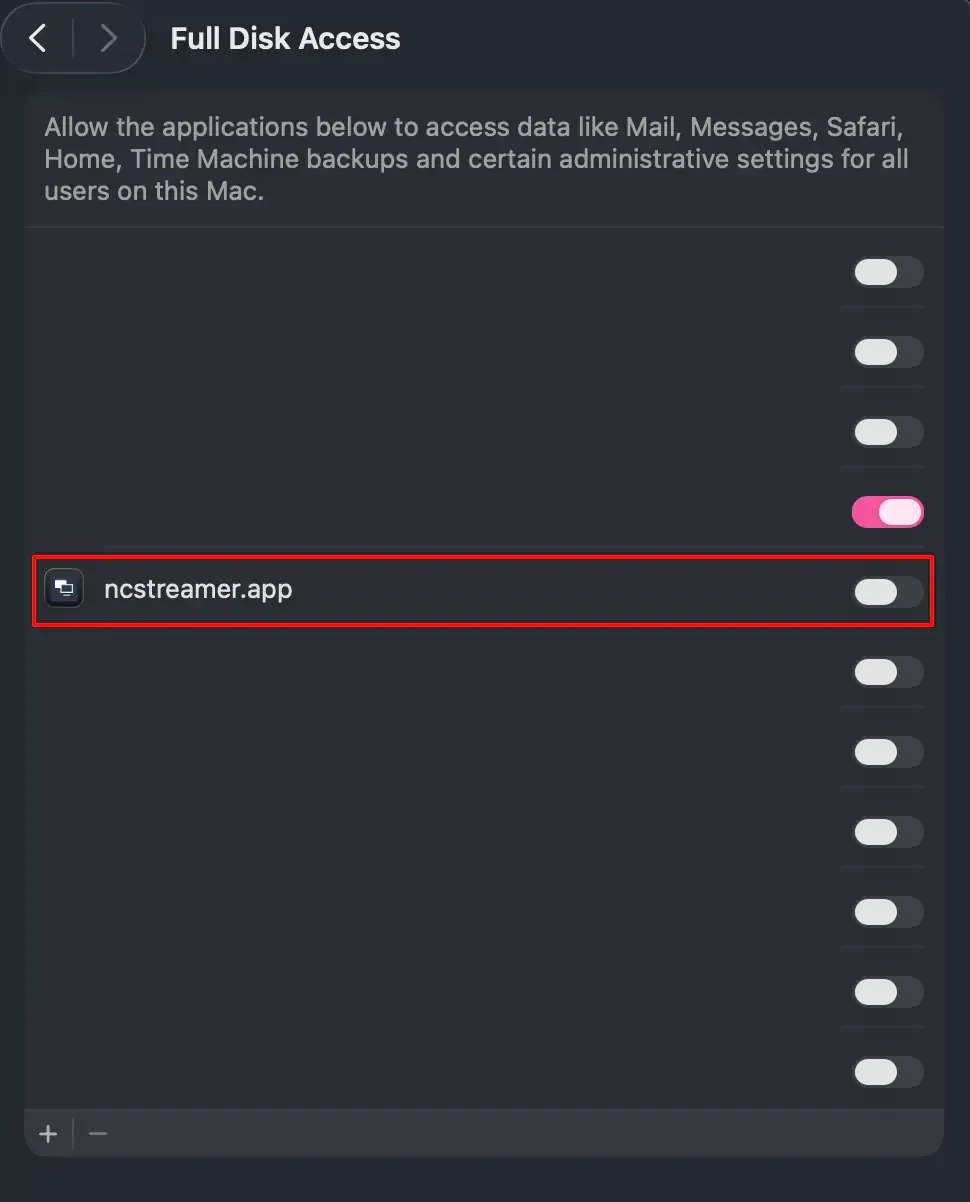
Granting permissions in macOS. After granting the permissions, you must restart Quick Connect for the changes to take effect. Close Quick Connect and open it again. macOS detects this automatically and displays a message that Quick Connect must be restarted. Confirm this message.
Alternatively, you can grant the permissions manually in System Settings. Open System Settings and allow them for NinjaOne Remote. Without Screen Recording, our support team cannot see your screen; without Accessibility, remote control is unavailable.
-
Approve access
Keep Quick Connect open. When our support technician starts the session, approve the connection request on your device if prompted.
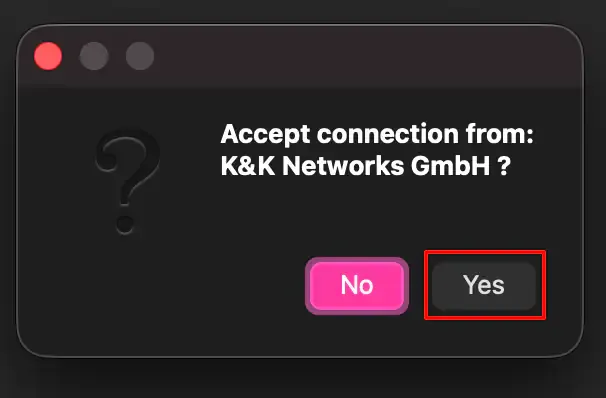
Approve the connection request only for the remote-support session you arranged.
Linux
Follows.
iOS
Follows.
Android
Follows.
Troubleshooting
The connection code is rejected
Check that you entered all ten digits without spaces. In NinjaOne Assist, also select the European or EU instance. According to NinjaOne, choosing the wrong instance can cause the app to report that the code is invalid.
The app does not open
Open NinjaOne Assist manually or use the App Store or Google Play button on the home page. Then return to the app and select Share My Screen or Remote Support Portal.
Our support team cannot see the device yet
Check your internet connection, keep the app or Quick Connect open, and approve any pending sharing prompts. Then tell our support team that the device is ready.
Product information and screenshot sources: NinjaOne Assist documentation, Quick Connect documentation, and macOS permissions.
Direct support
Fastest way to contact our support team: